WES
Mass update from one field to another (Zoho CRM)
STEP 01
Create a checkbox to trigger your workflow
To get started, first, you’ll need to access your Zoho CRM settings.
In a new tab or window, log in to your Zoho CRM account and click on the gear icon at the top right corner of the page, beside your profile picture.
From the menu, click on “Modules and Fields” under the Customization menu.
On this new page, drag and drop a checkbox field and label it “Trigger Workflow”:
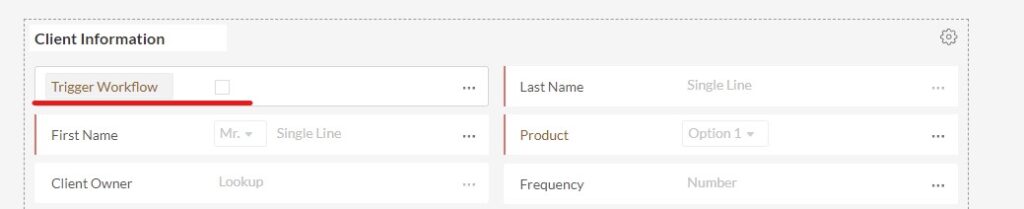
After this, hit “Save and Close” on the top right side of the screen.
STEP 02
Create a new workflow
After the checkbox is created, go back to the Zoho CRM Settings page.
From the menu, click on “Workflow Rules”.

On this new page, click “Create Rule”
Fill in the prompt box with the module you want to use, a name for your workflow (we recommend using descriptive names), and a description.
STEP 03
Configure the workflow to trigger on the checkbox from Step 1
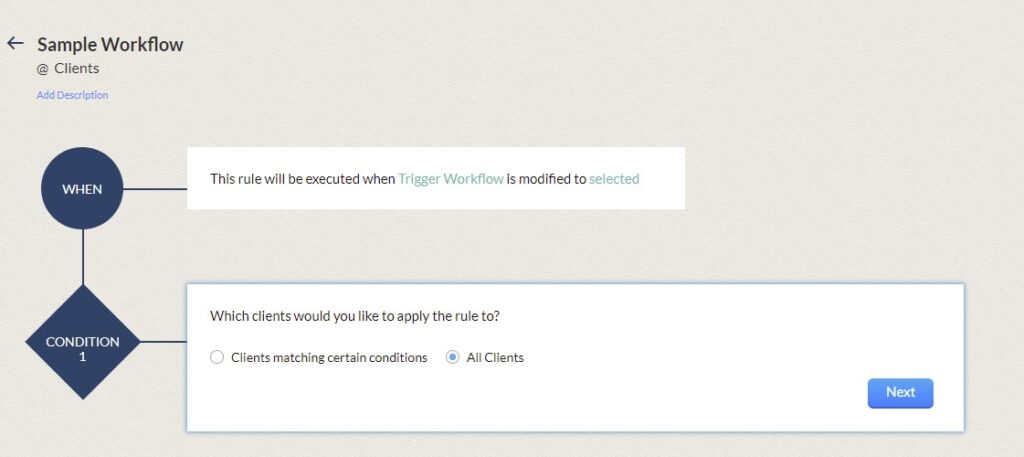
In the workflow editor, define the “When” as when the Trigger Workflow checkbox is Selected.
If you only want to move the data for specific records, you can use the conditions to enable this. Otherwise, just select “All”.
STEP 04
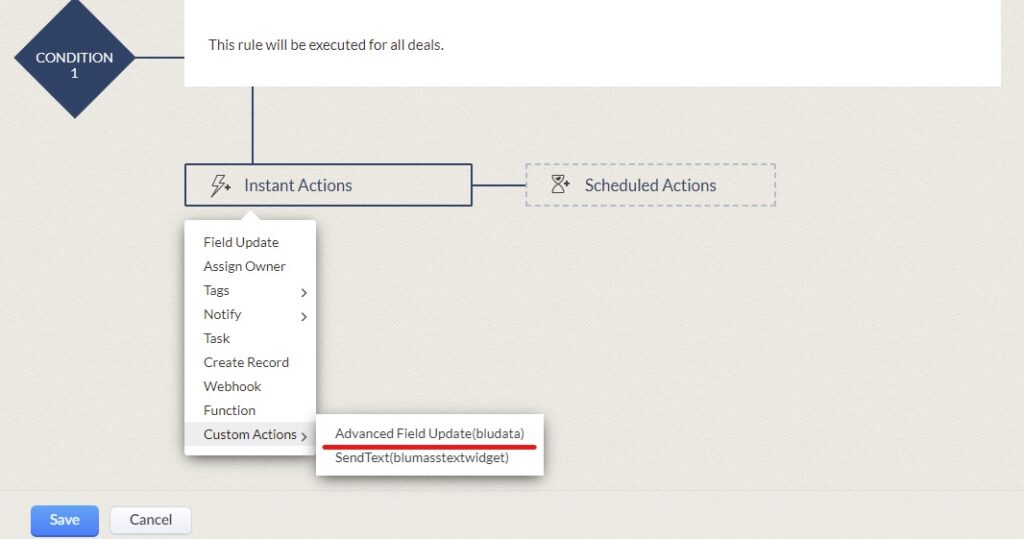
Select the "Advanced Field Update" under Custom Actions
Once the trigger and the condition are defined, the next step is defining the action.
The “Advanced Field Update” action is under the Custom Action menu. This is available for both Instant Actions and Scheduled Actions.
Note: If the Advanced Field Update is not available, you’ll need to download the WES extension: https://bluroot.ca/wes/
STEP 05
Select the "Field Update" flow and use merge tags to auto-fill data
The “Advanced Field Update” Custom Action gives the option for 4 different data flows. Select the “Advanced Field Update” data flow.
Select the field on the left as the destination field. On the right, define what is inputted to this field. By using merge tags, you can pull in data from any other field on the record.

Describe the mapping using the Custom Action name. This will be useful when making edits in the future. Click save on the workflow editor.
STEP 06
Use a Mass Update to trigger the workflow
Back in your module, select all the records that require the data movement.
Once selected, choose the Mass Update option from list view menu:
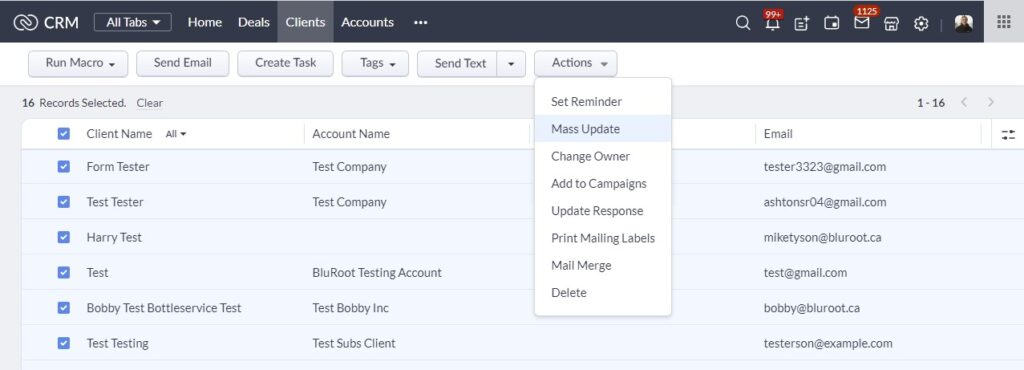
From there, select the “Trigger Workflow” field and check the box. For each record, the WES flow will run and transfer all the data!
STEP 07
Get the help you need
You can get the Advanced Field Update Custom Action by downloading the WES extension:
If you have any questions at all, please do not hesitate to reach out to our support team at support@bluroot.ca.
Happy WES-ing!
Get Your Questions Answered
Still have questions? The BEST way to get them answered is to meet with a Zoho Expert. Join our free office hours, get your questions answered, and see us in action with other Zoho businesses- like you!