Zoho CRM
How To Setup Zoho CRM – Modules, Fields, Personal and Company Settings
STEP 01
How to set up your company
First things first, when you log in you’ll see this page. Add your company name and press get started.
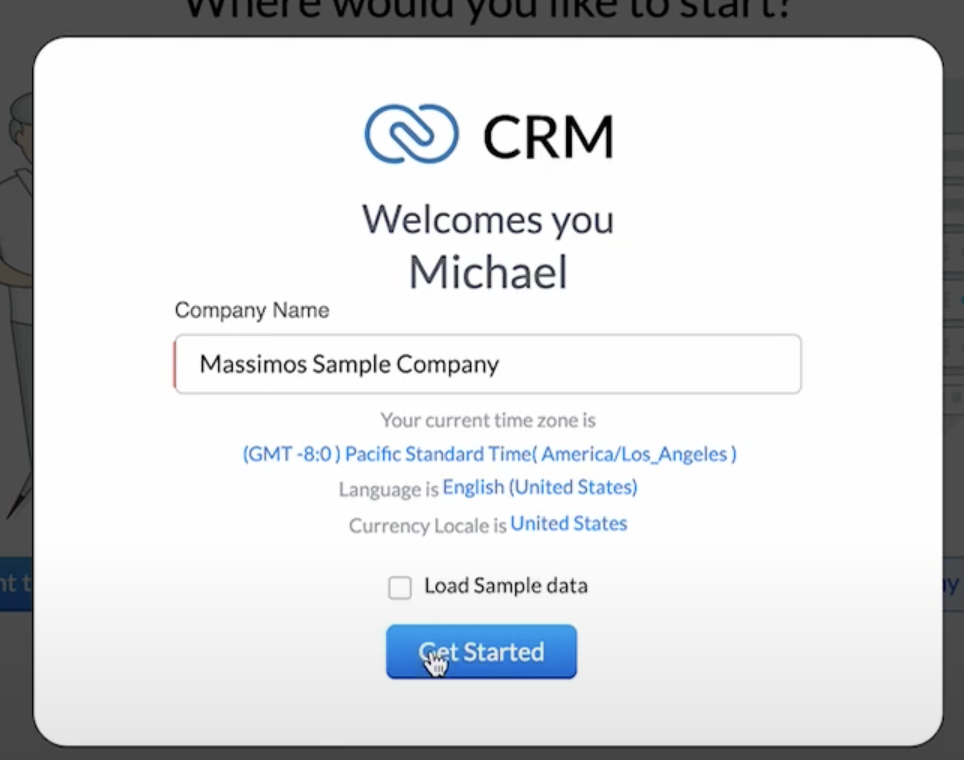
PRO TIP 💡: Unselect the load sample data if you’re setting up your company, otherwise that data will just clutter your CRM. But if you’re doing it only to try Zoho CRM functionalities, then keep it selected.
STEP 02
How to access the modules settings
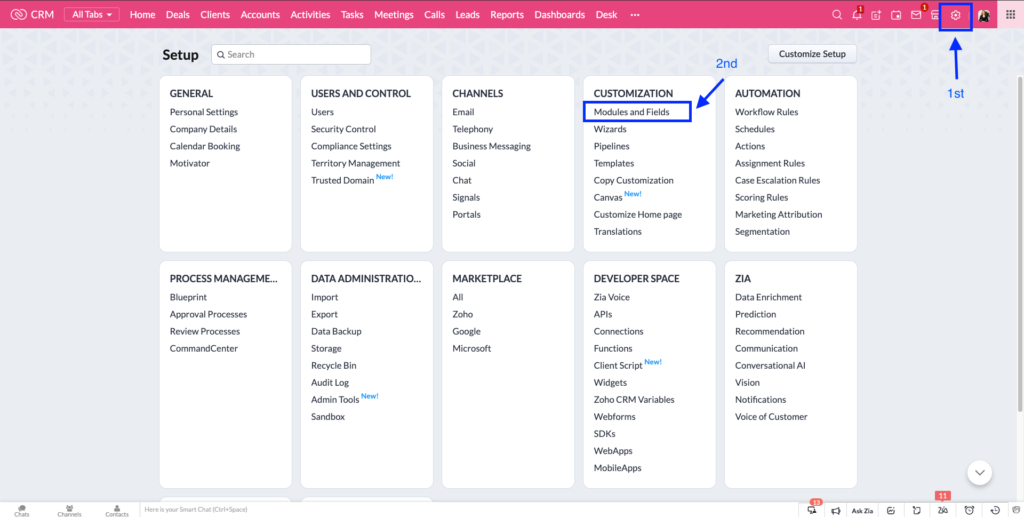
When you first get started, there’s a lot of modules that you might don’t need in your business. To start the declutter process you need to access your modules and fields settings. To do so click on the Settings icon on the top right corner, and then select “Modules and Fields” from the Customization menu.
STEP 03
How to access Zoho CRM Modules General Settings
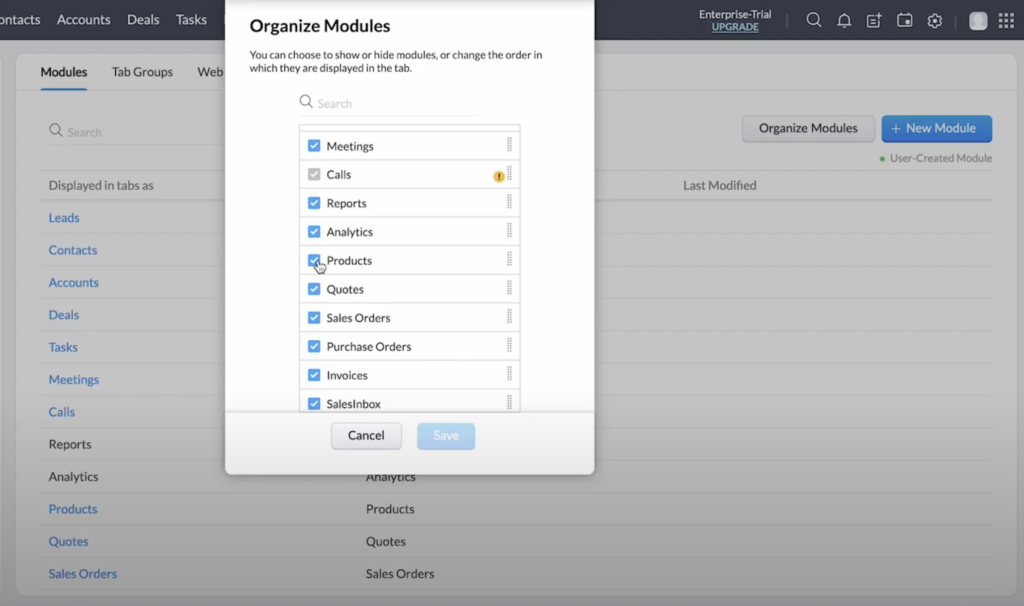
Here is where you will get rid of the modules you don’t use by doing the following: first, click on the “Organize modules” button.
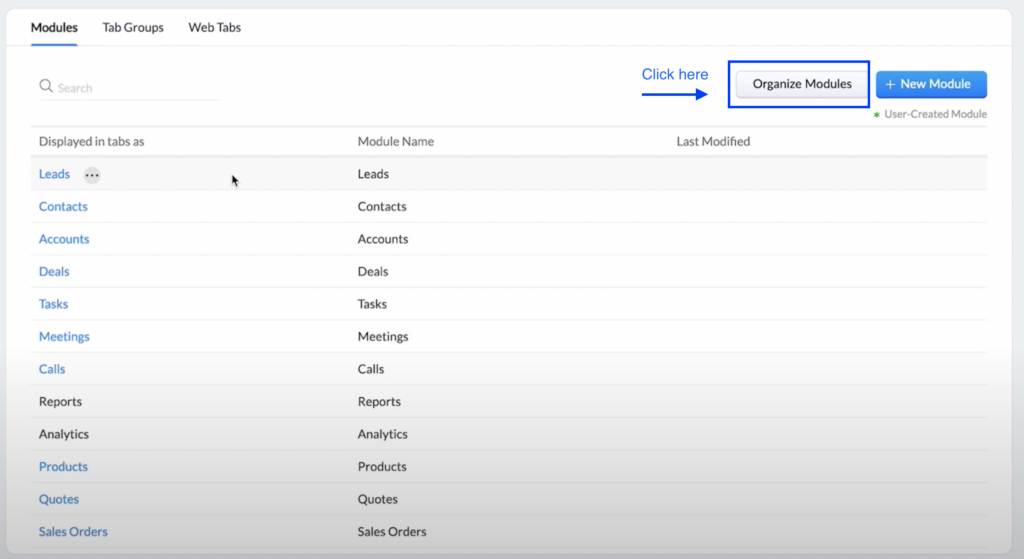
On this popup screen, unselect the modules that do not apply to your business. If it shows an alert pop up, hit “Yes, proceed”, then click the “Save” button.
STEP 04
How to access Zoho CRM Fields Settings
To access your fields settings inside a module, first click to select the desired module. In this example we’ll use “Contacts”.
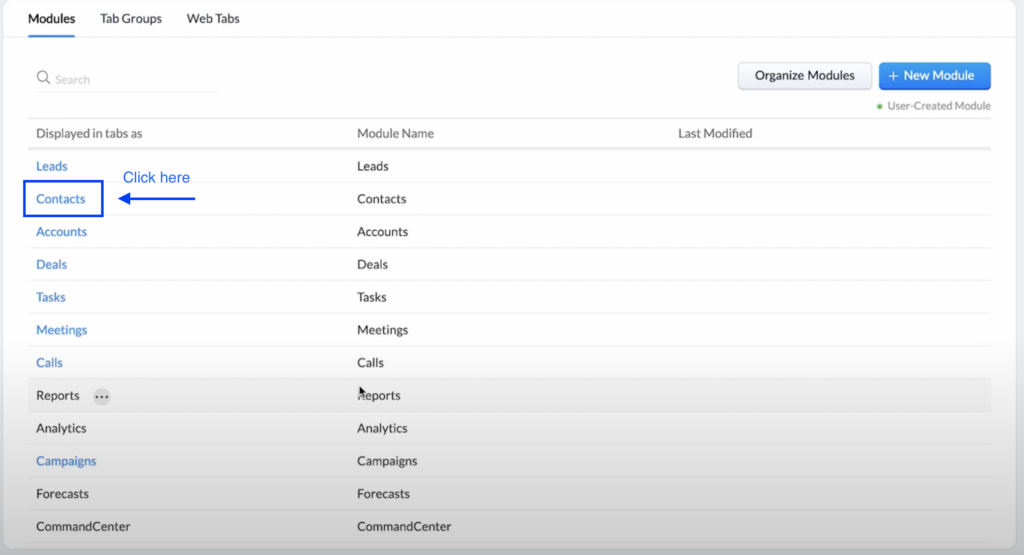
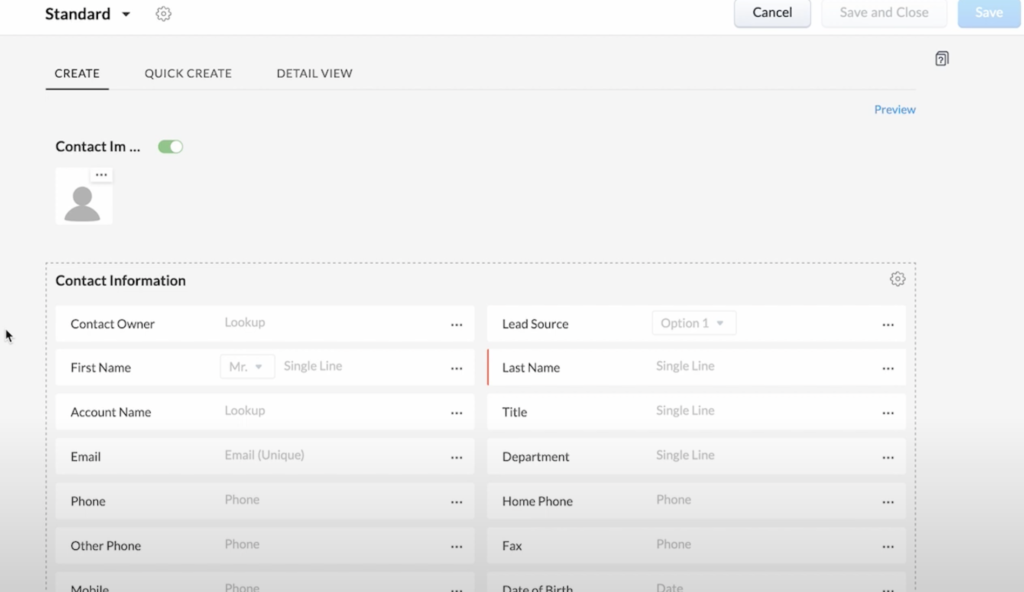
Inside the Contact module settings, click in the “Standard” layout.

The next screen should look similar to this:
STEP 05
How to Create a New Section inside your layout
To create a new section, simply click and drag from the left side menu:
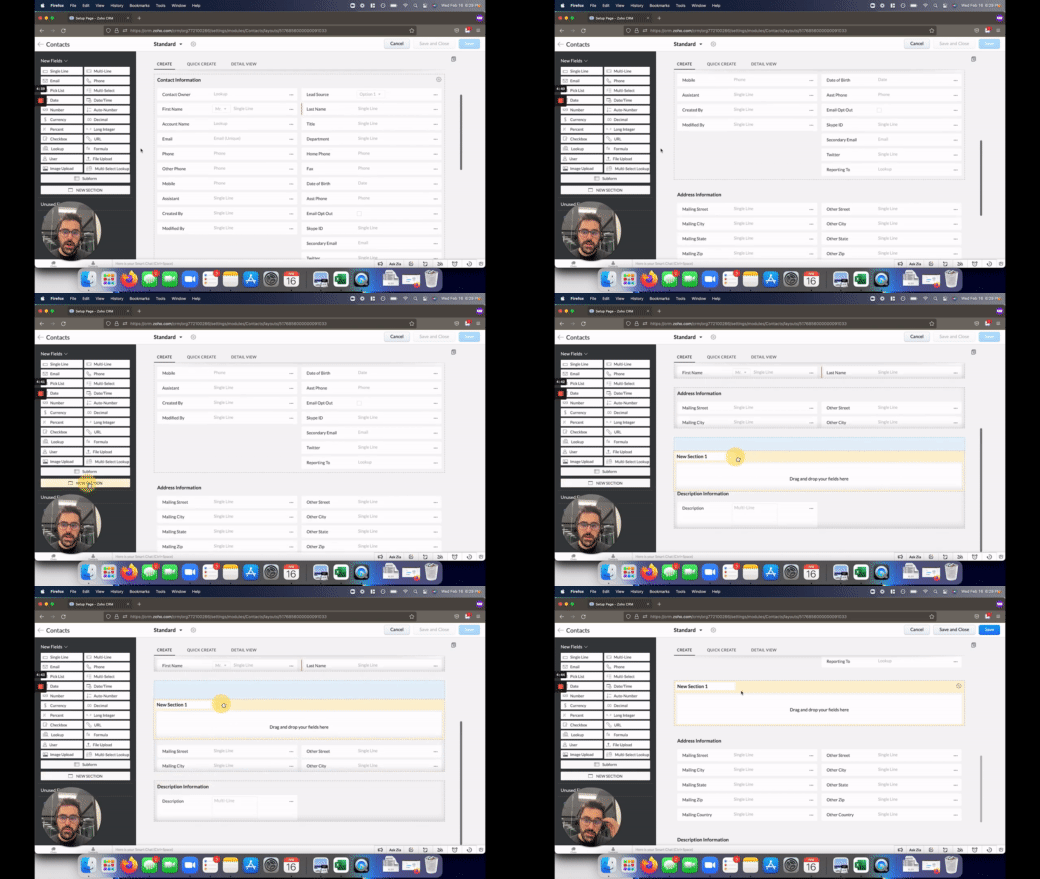
In this screen, you simply drag and drop the fields into sections as you judge necessary.
PRO TIPS 💡: We recommend keeping the sections by categories, like “Communication” where you put all the communication links together. Another tip is to keep the fields grouped by type, like all the phone numbers and emails side by side, for an easier visualization.
STEP 06
How to remove unnecessary fields
To get rid of a field, simply click the “…” on the right corner of the field and select “Remove field” from the dropdown menu.

Once you have finished all your settings inside the layout, click “Save and Close” on the top right corner of the screen.
STEP 07
How to setup Personal Settings
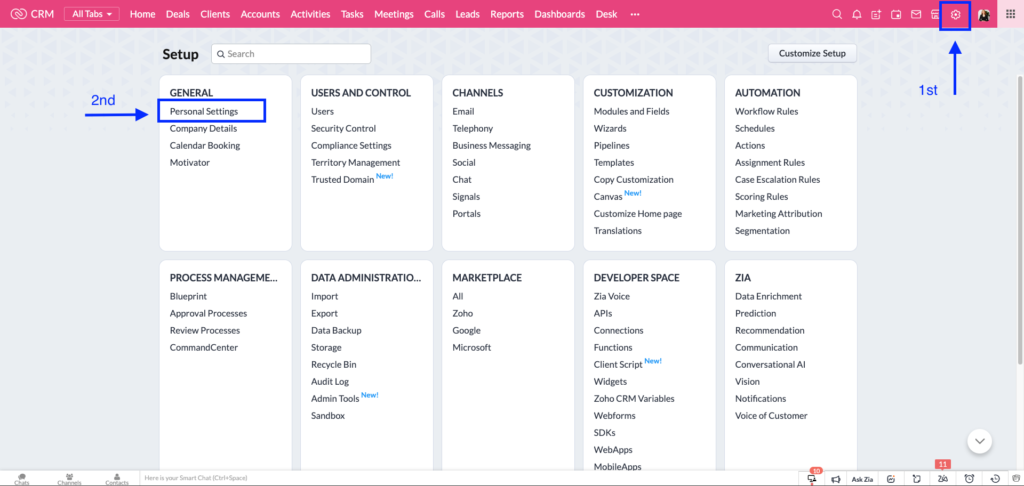
To access the personal settings, click on the Settings icon on the top right corner, and then select “Personal Settings” from the General menu.
To edit your “Personal Settings”, click the pencil icon on the top right corner of each section.
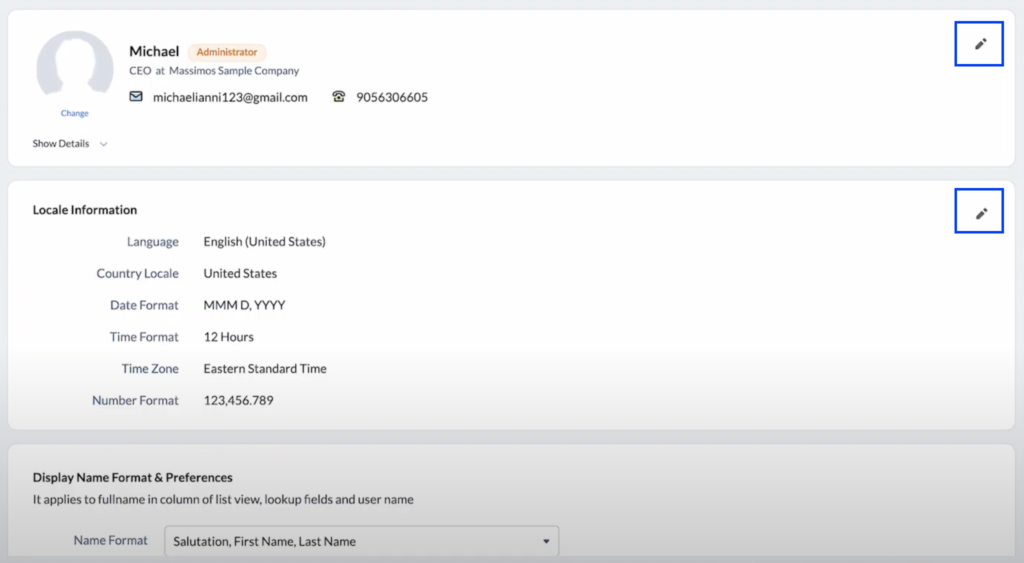
PRO TIP 💡: This info is what will be used in future automations, so make sure it is all accurate and up to date!
STEP 08
How to setup Company Details
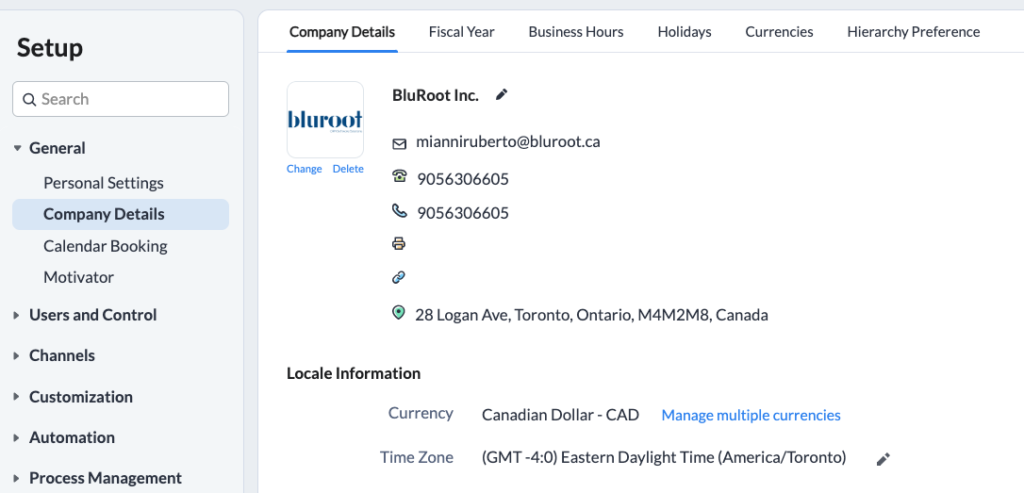
On the previous screen, select “Company Details” in the left top side of the menu. Here you’ll use the same steps as before by clicking on the pencil icon to edit the Company Details.
STEP 09
You've done it!
Now you have all the info on how to setup your CRM! Need more help? We have a video tutorial below or register to our office hours, where you can get help live with your Zoho questions!
Get Your Questions Answered
Still have questions? The BEST way to get them answered is to meet with a Zoho Expert. Join our free office hours, get your questions answered, and see us in action with other Zoho businesses- like you!


